
 how-to
Permanent Makeup Removal Process Explained
Table of Contents
- What Is Permanent Makeup Removal?
- Saline Tattoo Removal vs Laser: Which Method Works Better?
- How the Removal Process Works Step by Step
- How Many Sessions for Permanent Makeup Removal?
- Emergency PMU Removal Effectiveness and When It's Needed
- PMU Removal Healing Process and Aftercare
- Risks, Side Effects, and Managing Realistic Expectations
- Frequently Asked Questions
Last Updated: September 28, 2026
What Is Permanent Makeup Removal?
Permanent makeup removal lightens or eliminates unwanted cosmetic pigment using specialized techniques. Unlike temporary makeup, permanent cosmetic tattoos penetrate the dermal layer and require professional intervention to fade.
Common reasons for seeking permanent makeup removal include color shift (pigment turning orange, blue, or gray), poor placement, dissatisfaction with shape or darkness, or changing preferences.
Permanent makeup removal is gradual: pigment particles are fragmented and absorbed by the body's lymphatic system over weeks following each treatment.
Permanent makeup removal requires patience, multiple sessions spaced weeks apart, and commitment to proper aftercare.
Saline Tattoo Removal vs Laser: Which Method Works Better?
The two primary permanent makeup removal methods are saline solution and laser treatment. Each works differently on pigment, and the best choice depends on your specific situation, skin type, and pigment composition.
Saline removal uses an alkaline solution to break down pigment molecules, triggering controlled inflammation and immune response. Saline works well on organic pigments, is gentler on sensitive skin, and carries lower hypopigmentation risk, making it preferred for darker skin tones (Fitzpatrick types IV-VI).
Laser removal uses concentrated light energy to fragment ink particles. Different wavelengths target different colors; Q-switched Nd:YAG works on dark pigments, while alexandrite and ruby target broader spectrums. Laser requires fewer sessions than saline but carries higher side-effect risk on darker skin.
Understanding pigment color shift during removal. Pigment may temporarily turn red, orange, gray, or darker, a predictable chemical reaction, not failure. Organic pigments oxidize when fragmented; iron oxide turns gray or black, while red/orange pigments may intensify before fading within 2-4 weeks as the body clears particles.
Skin type considerations and contraindications. The effectiveness and safety of each removal method varies significantly by skin type:
- Fitzpatrick types I-II (fair skin): Both saline and laser are effective with minimal risk. Laser removal is typically faster, though slight temporary redness is common.
- Fitzpatrick types III-IV (medium to olive skin): Both methods work well. Saline may be preferred to reduce hypopigmentation risk, though laser can be used with appropriate settings and expertise.
- Fitzpatrick types V-VI (darker skin): Saline removal is strongly preferred. Laser carries significant risk of hypopigmentation (creating permanent pale patches) and post-inflammatory hyperpigmentation. If laser is used, only experienced practitioners using lower fluence settings and longer wavelengths (1064 nm Nd:YAG) should perform treatment.
Additionally, individuals with active skin conditions (eczema, psoriasis, active acne), keloid-prone skin, or a history of abnormal scarring should discuss both methods carefully with a practitioner, as removal may trigger or worsen these conditions.
Saline works better on organic and lighter pigments with a gentler profile for sensitive and darker skin. Laser performs well on darker, saturated pigments but requires caution on darker skin. The right choice depends on pigment color, skin type, depth, and side-effect tolerance.
A patch test on a small area, evaluated after 4-6 weeks, assesses color shift, healing response, and adverse reactions before full treatment.
How the Removal Process Works Step by Step
The permanent makeup removal process follows a structured approach designed to minimize trauma to the skin while maximizing pigment fragmentation.
Step 1: Consultation and patch test. Your technician evaluates pigment depth, color, and skin type. A patch test shows how your skin responds to the chosen removal method.
Step 2: Numbing and preparation. Topical anesthetic is applied, and the area is cleaned to ensure proper contact with the removal solution or laser.
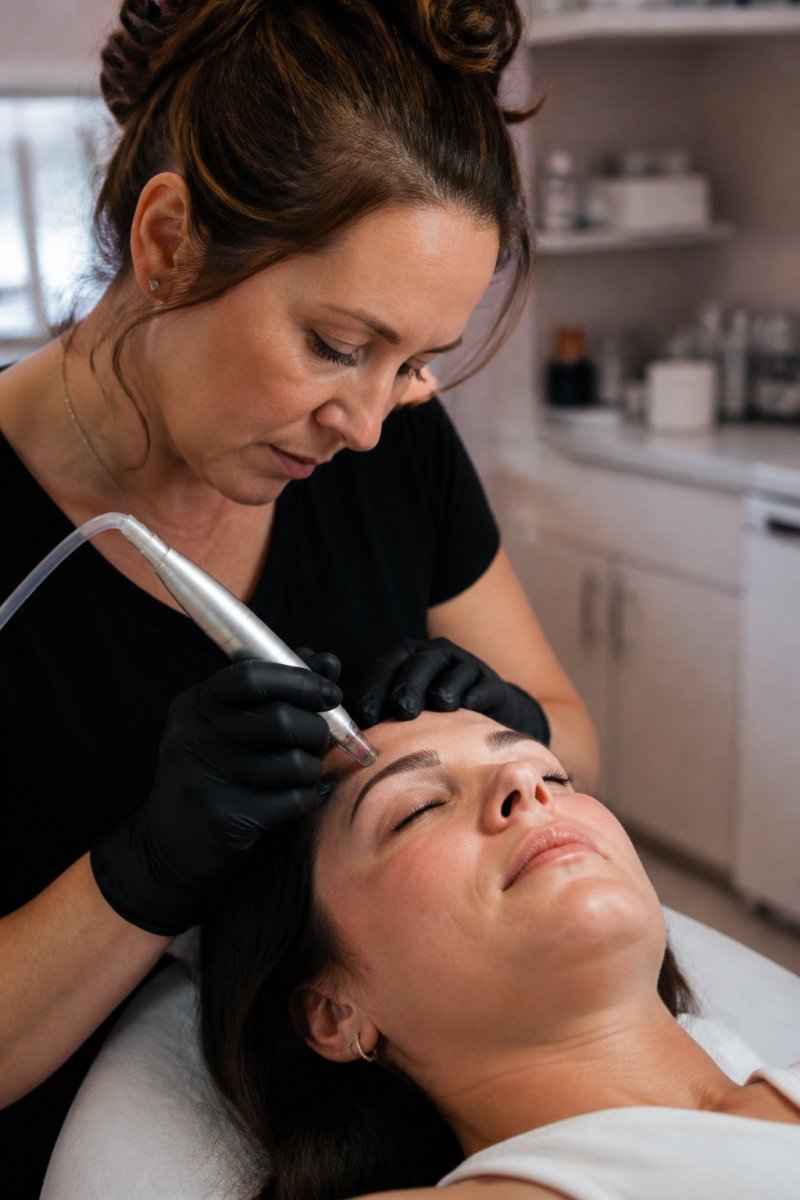
Step 3: Application of removal solution or laser. Saline is injected to break down pigment molecules; laser is passed over the area in precise patterns to fragment ink particles.
Step 4: Immediate aftercare. Protective ointment is applied with detailed aftercare instructions. Expect redness, swelling, and crusting over 7-14 days.
Step 5: Healing and pigment clearance. Over 4-6 weeks, the body removes fragmented pigment and skin regenerates, showing the most dramatic lightening.
Most people need 3-5 sessions spaced 6-8 weeks apart, with visible results appearing 6-8 weeks after each treatment.
How Many Sessions for Permanent Makeup Removal?
The number of sessions needed for permanent makeup removal varies based on pigment saturation, color, depth, and your skin's response to treatment.
Most people require 3-5 sessions for substantial lightening; lighter pigments may fade in 2-3 sessions, while saturated colors may need 6-8. Each session removes a percentage of remaining pigment.
Session spacing is critical. You must wait 6-8 weeks between sessions to allow your body to fully process fragmented pigment particles and for your skin barrier to fully heal. Attempting sessions too close together risks excessive scarring and skin damage.
Factors that influence session count include:
- Pigment color: Lighter colors fade faster. Reds and oranges may require more sessions than blacks or browns.
- Pigment depth: Deeper pigment penetration requires more sessions to reach all layers.
- Skin type: Some skin types clear pigment more efficiently through lymphatic drainage.
- Original technique: Professional-grade pigments applied with precision may require more sessions than amateur work.
A realistic timeline for significant lightening is 6-12 months with 3-4 sessions spaced 6-8 weeks apart. Complete removal may not be fully achievable; the goal is usually substantial lightening.
Emergency PMU Removal Effectiveness and When It's Needed
Emergency permanent makeup removal is immediate intervention following a procedure with wrong color, placement, or technique discovered during or immediately after application.
Emergency removal effectiveness depends on timing. If caught within 24-48 hours, some pigment can be lifted or lightened using saline extraction or immediate saline removal application. The pigment hasn't yet fully settled into the dermal layer, making removal more straightforward.
However, immediate removal adds stress to already-traumatized skin. Most professionals recommend waiting 4-6 weeks to allow the initial procedure to heal first.
For severe color shift or dangerous placement, immediate saline application can reduce pigment load before full integration, potentially reducing total sessions needed.
Emergency removal within 48 hours is moderately effective but carries higher scarring and damage risks. Waiting for proper healing before standard sessions is often safer.
PMU Removal Healing Process and Aftercare
The healing process after permanent makeup removal follows a predictable timeline, but proper aftercare is essential for optimal results, minimal complications, and long-term skin health. The removal process damages the skin intentionally to break down pigment, so supporting skin barrier repair is as important as the removal itself.
Days 1-3: Acute inflammation phase. Redness, swelling, and tenderness are normal. Avoid touching, picking, or makeup. Keep clean and dry, apply provided ointment as directed, and avoid all other skincare products and actives.
Days 4-10: Crusting and scabbing. A crust forms containing fragmented pigment.
- Weeks 1-2: Use only the provided ointment and gentle cleansing. Avoid water exposure beyond gentle rinsing.
- Weeks 2-4: Introduce a barrier-repair moisturizer with ceramides and hyaluronic acid. Apply twice daily to damp skin to lock in hydration.
- Weeks 4-8: Continue moisturizing and sun protection. If skin remains sensitive, consider adding a product with centella asiatica or allantoin, both known to support barrier healing.
- Beyond week 8: Gradually reintroduce other skincare, but avoid actives (retinoids, acids, vitamin C) for at least 12 weeks post-removal. These can irritate healing skin and interfere with pigment clearance.
Aftercare protocol essentials:
- Keep the area clean and dry for the first 48 hours
- Apply provided ointment 2-3 times daily for 7-10 days
- Avoid direct sun exposure for at least 2 weeks; use SPF 30+ for 12 weeks minimum
- Don't submerge in water (baths, pools, hot tubs) for 10 days
- Avoid makeup and skincare products on the treated area for 2 weeks
- Don't exercise or sweat heavily for 3-5 days
- Avoid picking, scratching, or touching the treated area
- Do not use active skincare ingredients (retinoids, acids, vitamin C) for 12 weeks
- Support barrier repair with ceramide-based moisturizers weeks 2-8
Risks, Side Effects, and Managing Realistic Expectations
Permanent makeup removal carries real risks that deserve honest discussion. Understanding potential complications helps you make informed decisions.
Potential complications include:
-
Scarring: Aggressive removal or poor aftercare can cause permanent scarring. The treated area may develop texture changes or visible marks.
-
Hypopigmentation: The treated area may become lighter than surrounding skin, creating a pale patch. This is more common with laser removal on darker skin tones.
-
Hyperpigmentation: Conversely, some people experience darkening of the treated area during healing. This usually fades but can persist.
-
Infection: If aftercare is neglected or the area is contaminated, infection can occur. Signs include increasing redness, warmth, pus, or fever.
-
Allergic reaction: Rarely, people react to the saline solution or other treatment components.
-
Incomplete removal: Some pigment may never fully clear, particularly deeply embedded or unusual pigment colors.
-
Multiple sessions (usually 3-5 minimum)
-
A 6-12 month timeline for significant results
-
Possible incomplete removal to completely invisible levels
-
Temporary worsening of appearance during healing phases
-
Potential for minor scarring or skin texture changes
-
Cost and time investment
Frequently Asked Questions
How many sessions does permanent makeup removal typically require?
The number of sessions for PMU removal depends on pigment depth, color, and the removal method used. Laser removal often requires 4-8 sessions spaced 6-8 weeks apart, while saline removal may need 3-6 sessions with similar intervals. Darker pigments and deeper dermal placement generally require more sessions. A professional consultation can provide a personalized estimate based on your specific pigment characteristics.
What is the difference between saline tattoo removal and laser removal?
Saline removal uses an alkaline solution to lift pigment particles toward the skin's surface through osmosis, triggering the body's natural healing response. Laser removal fragments ink particles using targeted light energy, which macrophages then remove through the lymphatic system. Saline is gentler on sensitive skin and works on all pigment colors, while laser is faster but may cause more post-treatment inflammation. Each method suits different skin types and pigment saturation levels.
Is permanent makeup removal painful?
Most clients experience mild to moderate discomfort during removal, similar to the original application. Topical anesthetics are typically applied before treatment to reduce pain. Saline removal often feels like a scratching sensation, while laser removal produces a snapping feeling. Pain tolerance varies by individual and skin sensitivity. Post-treatment soreness usually subsides within a few days as part of the natural healing process.
What should I expect during the PMU removal healing process?
After removal, expect crusting, scabbing, and mild swelling for 3-7 days. The treated area will darken initially as pigment fragments move toward the skin's surface before fading. Avoid picking at scabs to prevent scarring risk and hypopigmentation. Follow your technician's aftercare protocol, which typically includes gentle cleansing, moisturizing, and sun protection. Full healing takes 4-6 weeks, though pigment fading continues for several months as your lymphatic system processes the fragmented ink particles.